Tuesday, December 21, 2010

GBC Secret Santa 2010

You may or may not know that we had a Secret Santa gift exchange over at the Gunblogger Conspiracy. We all signed up and got our Secret Santas assigned by pdb, who organized the entire thing.

My Secret Santa's gift arrived today, just in time for the mass (dis)organized opening in IRC. My Secret Santa was ArcticElf, who sent me an Orlite AR magazine especially to induce misfeeds for failure drill purposes, and included 6 .223 snap caps as well. In addition to the magazine, ArcticElf included a MagPul B.A.D. Lever for my AR. This is an extension for the bolt catch release, designed to allow operation using the right hand. Also included was a personal note explaining the magazine and its purpose, with a warning *not* to use it for serious purposes. Behold:


The text reads:

John,

The enclosed AR-16 magazine is quite possibly one of the worst ever produced. On any given day it can be relied upon to cause almost any imaginable malfunction, as a result it makes an excellent training aid for the AR platform and provides plenty of practice clearing various jams and malfunctions. Adding dummy rounds will only make this worse.

Please do not use this magazine for anything serious, I cannot stress its unreliability enough.

Good luck and happy training.

Merry Christmas,

ArcticElf

Thanks to both pdb for organizing the exchange and ArcticElf for the gift. I look forward to doing this again next year!

Thursday, December 16, 2010

Awesome New Photo Tool - Hugin

I was trying to find a solution for a coworker today, getting a wide area of the office into a single photo. This was a daunting task, as the area needed to be covered was around 100 feet wide and only about 40 feet deep. I figured I could perhaps stitch several photos together and make a panorama. As you may know, I do not use Windows or Photoshop. I kicked the Microsoft habit back in 2oo1, and haven't looked back since. I use Linux exclusively as the platform for all of my computing needs, though I will occasionally utilize my wife's OS X desktop for the sake of convenience (it is the only desktop system in the house at present time).

I'd researched photo stitching software a few years back, and only found complex and inadequate guides to sortof putting photos together with The GIMP. I use The GIMP as my primary post-processing and editing program, and am quite happy with its performance. For the uninitiated, it is full-featured photoshop workalike with active development. It is open-source and it is free. Check the link above for more info.

However, this post is not about The GIMP. I took my photos and set about finding a way to stitch them together for my coworker. A short Google search brought me to Hugin. I run Debian Linux, and Hugin is included in the standard repositories. I installed the application with its requisite dependencies and suggested optional related packages. The entire install footprint ended up at a mere 60MB. I ran through the steps presented to me by the program, and waited a few minutes for it to process the images (five 12 megapixel images from my Nikon D90). The results were astounding. This application is so well-developed that I had an incredibly impressive image in TIF format in a matter of 5 minutes, and there was nothing manual about the process.

I got to my usual coffee shop this evening, and thought I'd play a bit with some 30 second time exposures of the outdoor porch area. I wanted to see how Hugin handled this, given the differences in exposure and color temperature in such an environment, as well as knowing that the darker shots were underexposed due to the limitations I imposed on the camera when capturing the images.

Here are the images I started with, scaled down to 1024 pixels wide (if you click on them) for your viewing pleasure:


I simply dumped these photos into Hugin for processing, and out comes this, after about 3 minutes on my single-core not-current-technology laptop:

The photo (if you click it) has been scaled to 2048 pixels wide and converted to png format, but otherwise no post-processing has been done. The resulting TIF image was 5989x2037 pixels.

This is one impressive piece of software. There are many options that I haven't taken a look at yet, but this is what it produces out of the box, choosing the "photometrics" (which I believe evens out the exposure) and "difference" blend mode. Kudos go out to all of the developers of this software. This has got to be one hell of a project to get such a complex piece of software working so elegantly.

Check out the project page at:

http://hugin.sourceforge.net/

This is cross-platform software, and there are releases available for Windows, Mac OS, Linux, and FreeBSD. If you find this software as incredibly useful as I do, consider making a contribution to the project. There is a small link at the bottom of the home page for PayPal donation.

Wednesday, December 15, 2010

Brief Range Report - Winchester Q3131A1

A couple of months ago, I bought some Winchester 5.56 ammo at Cabela's to try out in the new rifle. It was on sale for $9.99, so I figured I'd pick up several boxes. I'd kept it in the range bag the first session I took the rifle out.

I decided to see how it performed the next session (in late November), and was pleasantly surprised at the vast improvement in my group sizes from the AE223. I'd shot a couple of targets using the AE223 at the beginning of the session, and was less than impressed at the grouping I got. Shots were all over the target. I certainly could attribute some of this to my ongoing issues with shooting iron sights against black targets, but they still didn't seem to reflect the consistency of my sighting. It was so bad, I didn't bother keeping or taking photos of the targets.

I loaded up some of the Winchester rounds and put 10 rounds through one of the targets that I was shooting with the AE223, and saw an immediate improvement. I loaded up a full mag of 30 and put 3 shots through that same target, then decided to move on to a fresh target, pictured below.


Excluding the two fliers at 1:00 and 9:00, that is a 1.5" wide and 2" tall grouping. This ammo seems to shoot *very* well in my rifle, certainly better than my ability to keep the rifle steady on target. On that subject, I just purchased a sling for the rifle, which should vastly improve my ability to steady my shots and improve my consistency. Just trying out the sling at home, I can tell a significant improvement in my ability to keep the rifle steady. I look forward to using it at the range this weekend.

I've also been able to work out both the plinking and hunting rounds mentioned in my last post. I've loaded up 200 of the plinking rounds using Winchester 55 grain FMJ-BT bullets, so I can see how well they run in numbers. I've got 50 rounds of the hunting load using the Speer 70 grain semi-spitzer soft point, to get a good feel for the load and its characteristics at different ranges. It looks like I won't get a hog hunt in this year, but an early 2011 hunt is possible. Hopefully, I'll get to put this load to some practical use in the near future.

Hopefully, I'll have something new to write up for you after the weekend.

Sunday, November 14, 2010

Rolling My Own...

I've been meaning to get a reloading post up for almost a year now. I just happened to be working up some .223 loads for the AR, so now seemed as good a time as any.


My reloading journey started 11 months ago, when I was given a Lee 50th Anniversary reloading kit by my mother-in-law as a Christmas Gift. I'd been working towards getting into reloading for some time, but had never got around to getting outfitted yet.

I started my foray into reloading with 9mm, as that's the caliber I get the most range time with. I've since developed several loads, using Blue Dot, Power Pistol, and Titegroup.


With .380 so difficult to find and expensive when you did find it last year, I decided that .380 would be a great way to save some serious money reloading. I've found, using recovered brass, that I can put together a box of 50 rounds of .380 for $5.84 in component cost. It's a great thing to not be held hostage to the poor selection and high prices of factory-loaded .380. If I need .380, I can simply load some up and have it ready whenever I need it. Not only that, but I've been able to tune my loads for accuracy, and am able to make groups I never thought possible out of my Ruger LCP.


Today was my first time reloading rifle cartridges. This is a somewhat more involved process than loading handgun rounds. Case lube is required for resizing, powder is manually funneled into each case in the loading tray (there is no expanding die to put the powder through with rifle rounds), and bullet seating is a little more tricky if you're not using boat-tail bullets.


I managed to get two sets of loads worked up, one as a standard 55 grain FMJ-BT plinking round, where I'm going strictly for accuracy. The other is a hog/deer hunting round, built with the Speer 70 grain Semi-Spitzer. I'll have to see how these run through the AR, as it has a 1:9 twist rate. From my reading on the subject, this may or may not be enough to stabilize a 70 grain bullet. The Speer website claims 1:10 or better is sufficient for stabilizing this bullet, so I think I should be good to go. We'll see when I try them out.

If all goes according to plan, I'm going to hit up the range tomorrow with the chrony in tow and see how these loads run. Hopefully, I'll have an update for you tomorrow night with the results.

Monday, November 1, 2010

AR Build - Range Report

After successful completeion, I took the AR out for its inaugural range session yesterday. I went to Best of the West Shooting Sports in Liberty Hill, the same range used for the LaRue Tactical range day event earlier in the month. The short-range rifle spots are 50, 100, and 250 yards. I wanted to zero the rifle for 200 yards, and 50 yards is at about the upward trajectory intersection of zero for a 200 yard zero AR, so I decided to run at that range. Unfortunately, all of the 50y target boards were in use, so I hung around and talked to the Range Officer and some other guys having a conversation until some space cleared out.

Finally, space did clear up, and I stapled up 3 8-inch "Dirty Bird" targets in a vertical row. I loaded up some of the American Eagle "Tactical" AE223 55grn FMJ rounds I picked up on sale at Cabela's into one of the PMAGs, and chambered a round.

To be honest, the first shot was quite anti-climactic for me. I went with the heavy barrel for several reasons, one of which was to keep movement and rise to a minimum for faster followup shots. This was much more effective than I anticipated, and my first impression of recoil was more akin to that of my Marlin 60 than any centerfire rifle I'd ever fired. Nonetheless, it was quite satisfying to shoot a gun that I'd put together with my own hands for the first time.

On to zeroing in the rifle, after several shots I finally figured out that I was hitting the dirt about 18 inches both high and right. I adjusted my windage and elevation, and finally started getting my hits on paper. I went through about 70 rounds getting zero and checking consistency. This was compounded by the fact that I was sighting with a flat black front sight against a black target. I'm considering tipping my front sight with bright white or perhaps a flourescent green to solve this problem. Please feel free to give suggestions or advice in your commentary.


Anyhow, I finally got a 2.5" group in my last string of 20 shots on the zero target, so I moved on to a clean target. I'm a bit disappointed in the size of the grouping, but I'm pretty certain this is related to the black-on-black sighting issue. Excluding the flyer outliers at 12:00, 9:00, and 6:00, this is a 3.5" group. I think that once I remedy the sight issue and get more accustomed to AR iron sights, I can easily cut that into less than half.

As an aside, I'd like to make positive mention for the Best of the West Shooting Sports range. This is a great place with a great staff. During my zeroing, my front sight tool broke off all its prongs, and I was stuck. The Range Officer happily offered up his tools for me to use, and I was able to finish my vertical adjustments and finish zeroing the rifle. What's more, is that I went through 100 rounds of .223, but came back with around 350 cases. Not only does this range encourage you to pick up your own brass, they're quite happy if you pick up brass left by other shooters as well. This is in stark contrast to the policies of most ranges who claim your brass as their own as soon as it touches the ground. I've got the cases in the tumbler right now, and hopefully I can crank out a couple of batches of .223 sometime this week. I need to develop some hog-hunting loads using the Speer 70grn semi-spitzer bullet sometime in the next month.

The gun performed well, though I did hit one hiccup in the middle of zeroing. Over the period of about 40 rounds, the trigger pin walked itself to the right side of the receiver, completely detaching from the left. This became evident when a trigger pull did nothing. I cleared the gun and pulled the upper off, and was able to fix the problem quickly. My best guess is that I pushed the pin past the detent during assembly, so that the spring was not able to retain it in place. The problem did not repeat itself for the next 6o rounds, so I think this was a simple assembly fluke. I'll take a closer look at it sometime this week to be sure.

Thursday, October 28, 2010

AR Build - Completion!

My final shipment of parts for the AR built arrived today. It took a couple of weeks of waiting this time around, as RRA did not have my barrel in stock and were waiting on it before shipping out my order. The UPS tracker showed it as delivered to the doorstep this morning, so I came home for lunch to pick it up and bring it inside.

I couldn't help myself, and immediately started assembling the rifle. I didn't have time to completely finish, but did pull off the front sight housing/gas block, removed the unnecessary triangular handguard cap, and replaced the barrel nut with the special one that came with the handguard. The most difficult part of this process was removing the pins for the sight housing/gas block. All of the guides I'd gone though had tapered pins, but RRA uses dowel pins on their equipment. Once I got that figured out, the pins were easy enough to punch out, and then everything slid right off.

I got the barrel on just tight enough to stay put and threaded on the handguard and sight housing/gas block to get a look at it and a feel for it. It was quite satisfying to feel the heft and solidity of the gun, even when not completely assembled. That's all I had time for, so headed back to work and wait for the day to be over.


At the end of the work day, I rushed home and immediately started the rest of the assembly. I started by pulling the upper receiver off and sticking it in the upper action vise block (money well spent) and tightening down the barrel nut. Most sources I've found recommend 30 pounds of torque plus whatever it takes to get the holes in the nut aligned to allow the gas tube through into the receiver. Most sources I've found say 30-40 pounds should be about right, and that about 30 pounds of torque is optimal for best accuracy. The guide that came with my handguard recommends 35 pounds. Unfortunately, the holes don't line up on my barrel nut between 30 and 40 pounds of torque. I found that it was either 12 pounds or 50 to get the holes to line up, so I went with 50. I did a little more googling, and it seems 50 pounds is within acceptable range for the barrel nut, so all is OK.

I then threaded on the handguard, got it aligned, and tightened down the nuts that clamp it in place. Next came one of the more tedious parts of the build: pinning the gas tube into the sight housing/gas block. This is a roll pin, and is quite difficult to get started. I see why Brownells makes a front sight bench block to work on these kinds of things, as keeping the sight housing stationary on a flat surface while tapping in the roll pin is quite challenging. It took me quite a while to get the pin started, but getting it fully seated after that was a cinch.

Once the gas tube was attached, I slid the sight housing/gas block and on and got things aligned. Next up was to re-pin the sight housing/gas block. This was a bit of a challenge, and I ended up setting the upper on the floor and putting the sight housing on top of a 2x4 I had handy, then carefully tapping the dowel pins back in. Again, the front sight bench block from Brownell's would have made this much simpler. Once this was done, I installed the front sight detent/spring and post. This is very straightforward - just put the spring and detent in its little hole, then thread the sight post into its hole. Once the post starts hitting the detent, use a sight tool to screw the post down further until it's flush in the housing.


Next up was the flash hider. This is pretty straightforward to install. Brownell's video on this is quite helpful. I got the flash hider on hand-tight against the crush washer, and then rotated it about 270 degrees until it was aligned correctly. This was by far the easiest part of today's assembly. My AR wrench actually has a slot specifically for this, so no new tools were required.

The last and most tedious part of assembly was the sling swivel. as simple as this sounds like it should be, there's very little room to get a backing on the rivet in order to mushroom it with a punch on the other side. I tried several different methods, and what I ended up doing to get it to work was gingerly place the back of the rivet on the corner of my vise jaw, to give it as solid base. I hammered away at the top end of the rivet, and it mushroomed up nicely. Oddly enough, the Brownell's videos don't specify how they back the rivet, and whatever they use is not shown in the video. I'd be curious to hear how other folks accomplish this.


And so, my rifle is complete! I won't be able to get to the range until Sunday, but that will give me time to get it lubed up and to check it with the headspace gauge.

This has been an exciting process, and I'm very glad that I went the build route for my first AR. I'm quite satisfied with how the gun has turned out, and am itching to get her to the range. I should have a range report for you in the next couple of days.

Sunday, October 17, 2010

LaRue Tactical Range Day

LaRue Tactical, a local (Leander, Texas) AR manufacturer, had a range day at the new Best of The West range in Liberty Hill. LaRue makes very nice and high-quality equipment. I considered them as a supplier for parts for my AR build, but their prices are well above my budget for a rifle.

Anyhow, this was the first time they've put on this event, at the new Best of The West range in Liberty Hill. The range just opened a couple of months ago, and I've heard some overwhelmingly positive reviews about the place.

It is the only range of its kind anywhere near here. They've got 400 acres of land with a 1000yd rifle range, 8 tactical shooting bays of varying sizes for running and gunning drills, 2 skeet fields, 2 trap fields, and a pistol range. They've also got RV hookups and plans for a 3D archery range and courses. The place seems to be made specifically for practical training and competition. It's as if someone finally listened to the shooting community and built a range to fit our needs.

LaRue provided guns, ammo, and food free of charge to the public. There were several shooting stations with different caliber guns and different styles of shooting (prone, standing, supported with a barrier, etc). I ran into some coworkers, so we hung out and shot stations together.


If I had to guess, I'd say something like 2000 people showed up yesterday. The event ran from 10am until 5pm, but I didn't show up until a little after 2pm. Folks I've talked to who went earlier in the day report very long waits (over an hour) for just about everything, including food. By the time I got there, the wait for different shooting stations was 20-30 minutes.

If LaRue makes this a recurring event, they would do well to beef up the stations with more places and have more staff available to ease the wait times. It seems like turnout was far above any expectations, so the LaRue folks were simply overwhelmed with the number of people there. Despite all that, they made the event a great one. I certainly had a great time shooting their guns. My only regret is that I didn't have time to shoot all the stations, especially the prone distance shooting station they had set up.

My favorite gun of the day was the 7.62 OBR with a Trijicon ACOG on top (pictured above). It was a really sweet shooter, and made accurate shots easy. I really dug the caret-shaped ( ^ ) red reticle in the ACOG. Thanks go out to everyone from LaRue who made this event possible. I look forward to attending again if this becomes a recurring event.

Wednesday, October 6, 2010

AR Build - Handguard

I've got an incremental update today, as my handguard arrived from Rock River Arms. So to have something to show you between now and the next shipment and completion of the rifle, I loosely threaded on the barrel nut and handguard.


Installation is pretty straightforward. The handguard comes with a special barrel nut that's threaded on the outside. Once the nut ins installed as normal with the barrel, then the handguard threads onto the outside of the nut. Once in position, two allen bolts clamp the handguard in place on the barrel nut threads, and presto!


The barrel assembly, gas tube (and pin), front sight post/spring/detent, sling swivel (and rivet), flash suppressor, and crush washer will be ordered tomorrow. It should all arrive in about a week, as long as everything is in stock. I'm getting close!

Friday, October 1, 2010

AR Build - Upper Receiver/Bolt Carrier Group/Charging Handle/Rear Sight Install

My upper receiver, bolt carrier group, and charging handle arrived 2 weeks ago, I just never got around to taking photos and making a post about it. I decided to make this post a combination of those items plus the rear sight, which is probably good because a post only about installing a rear sight sounds a bit boring.

I also ordered some tools to aid in the rest of the build, as they're pretty necessary beyond this point, especially for the barrel, handguard, and associated bits . I got a set of vise blocks, for both the upper and lower receivers. In addition, I ordered a front sight tool (the screwdriver handle type), a headspace gauge, a bolt catch punch, and some aluminum black for the small scratches I made at the front of the bolt catch pin channel the first go around. I also stopped by Harbor freight and picked up a clearance sale bench vise for a cool $6.

First order of business was to replace the bolt catch pin. I do realize that it is not absolutely necessary to build an AR, but the lower receiver vise block (in a vise) makes installing the magazine catch (and pretty much any other work on the rifle) immensely easier. I popped out the old mangled pin, started the new one in, lined everything up, and presto! What took me 20 minutes to do improperly the first time took me a brief 2 minutes the second time around, done properly. I swabbed on the pale blue transparent Aluminum Black onto the scratches. The bits of shiny silver turned black before my eyes, and were completely gone within a few minutes. That aluminum black is neat stuff.


The receiver/bolt carrier group/charging handle require very little in the way of assembly. The biggest challenge was getting the charging handle in just right to ride in the channel. After that, the bolt carrier group slides in behind it, and that's it. I'm learning during this process that the AR is a cleverly simple design. Things go in only one way, and retention is as simple as possible.

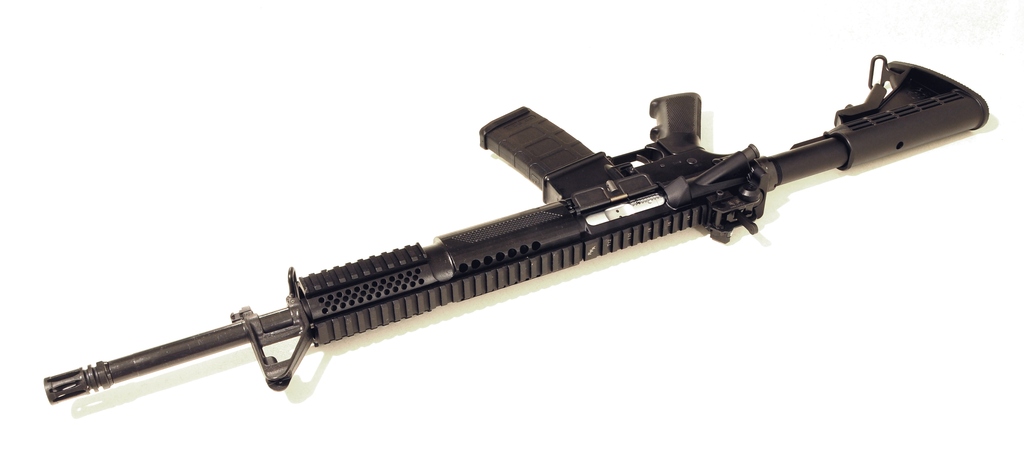
Once put together, I installed the upper reciever on the hinge pin, lowered it down and closed the takedown pin, and WA-LA! It seems to me that the most difficult part of assembly is installing the barrel and (because it's free-floating) the handguard. The barrel will be a full assembly, but will necessitate a dissassembly due to the fact that (a) the barrel nut has to be changed out, and (b) the handguard requires the removal of the front sight/gas block for installation.


And that brings us to the arrival of my rear sight today. I ordered the Matech 600m BUIS (Back Up Iron Sight) from Botach Tactical, as they've got it on sale for about $50. I'm a fan of small apertures (My Mosin-Nagant 91/30 has aftermarket aperture sights, and I've swapped the aperture inserts for the smallest ones available), so this sight seems well-suited for me.


I installed the sight onto the rearmost slot of the picatinny rail per the instructions. Funny thing about the instructions - they dont' say how to get the sight flipped up from its folded position. I poked, prodded, pushed, and pulled everywhere I knew how. The internet is scarce on instructions of how to do this as well. Doing a Google search, I only got as far as "matech si" before the first option in autocomplete became "matech sight instructions". Apparently, I'm not the only one who has been confused by this. I eventually found a reference to flipping the sight up with your thumb (as opposed to the folks who sell these and call it "one touch operation").


So, for those of you out there finding this page in a desperate search to figure out how to flip up your Matech sight, here it is: just pull up on it. It is held down by some sort of stiff detent, and requires considerable pressure to release. I guess this is good, since you don't want the thing to pop up in the middle of your vision during a firefight. It would be helpful if the manufacturer actually told you how to do this, though. The instructions that came with my sight start off with rail installation and jump directly into zeroing it in.

That's all I've got for you for now. The handguard is on order, and should arrive within a week. Unfortunately, I won't be able to do anything with it until the barrel, gas tube, and associated fiddly bits arrive. I figured it was better this way - if I'd ordered the barrel first, It would drive me nuts knowing that all it needed was the handgaurd.

Friday, September 3, 2010

AR Build - Buttstock/Buffer Install

The Big Brown Truck Of Happiness arrived today with my latest shipment from Rock River Arms. In addition to the buttstock/buffer, I also ordered a selection of magazines to see what I liked.

I ordered the Milspec Tactical CAR Buttstock, which is simply a standard M4-style collapsable stock. The install was very straightforward and simple. I followed the Brownells instructions, but opted for blue Loctite on the buffer tube threads instead of staking the castle nut. I got to use my AR-15 Armorer's wrench for the first time, and I'm happy that I purchased it.


For the magazines, I ordered 2 of each type RRA offers - PMAG, standard milspec, and Fusil MIG-welded steel.

I am somewhat of a traditionalist, and I don't particularly care for the use of plastic in firearms in general. Even though the PMAGs get rave reviews, I was quite skeptical that they could be as good as steel magazines. After opening up and inspecting the magazines, it became evident to me that the PMAGs are not just a remake of an AR magazine in plastic. No, they are quite an improvement on the original design, and I can see why folks love them. The ridges and channels that guide the follower in the housing make it impossible for the follower to tilt. They are also considerably more solid than I expected them to be. I am looking forward to seeing how these magazines perform once the rifle is built.


When comparing the magazines, the Fusil mags have a nice solid feel to them, as well as a beautiful black finish. The reviews I've read online indicate that they're tough and durable. When compared to the mil-spec mags, they certainly seem to be worth the extra five dollars.

I'm unsure of what I'll be ordering for my next shipment, as the upper will pretty much need to be all there for any further assembly. It will likely include the bolt carrier group, as RRA currently has the chromed option on sale for the standard carrier group price.

Saturday, August 28, 2010

AR Build - Lower Parts Install

After week-long boondoggle of UPS mishandling my package, my lower parts kit finally arrived today.

I ran up to Harbor Freight to get some punches after arriving home. Apparently they do not carry roll pin punches at the North Austin location. I opted for a simple multi-size set of steel punches in black oxide finish (they also don't carry anything but a honking 5/8" punch in brass), along with a nylon/rubber mallet.


I had a hard time coming into this build figuring out exactly what I needed in the way of tools. Certainly there are armorer's sets for building an AR, but those are prohibitively expensive for the first-time builder. Here is what I have learned are the essentials for putting a lower together:

A Bolt Catch Punch
I learned this the hard way today, by ruining my bolt catch roll pin. If you look closely at the photo (you can click it to enlarge), you may be able to see the mangled end of my magazine catch roll pin slightly protruding from the rear of where it's supposed to be. This will have to be replaced with my next order of parts. An ordinary punch WILL NOT fit there, because the shank is centered in the punch, and the handle can't fit against the lower, parallel to the pin. These punches can be found from pretty much anyone who sells AR tools. Both Midway and Brownells have them available. The trigger guard roll pin is also the same diameter, so this punch can be used there as well.

A Nylon mallet
I picked one up from Harbor freight for about five dollars, but you can find them at all kinds of places, including Midway and Brownells. This is useful for using your punches, but also helps you finish off installing the trigger and hammer pins without marring the finish of your receiver and pins.

Punches
Specifically, 1/16, 3/32, and 1/8 inch sizes. While the 1/16 is not strictly necessary, It's nice for lining things up while you're working. The 3/32 is good for the trigger guard release, and the 1/8 can be used to get the mag release completely screwed in to the button.

Now, these are the things I found that were needed for a successful install. Here are the things I wish I'd had today:

A Vise and a Lower Receiver Vise Block
While you can put together your lower without these, there's only so many fingers you can use while holding the lower in your hand. A vise will keep you from making mistakes due to the distraction of holding the receiver. It will also allow more precise work. You can get a vise at any hardware store/mega home improvement mart. Vise blocks appear to be available from pretty much anywhere that sells AR tools, including Midway and Brownells.

A Pivot Pin Installation Tool
Installing the pivot pin spring and detent can be a pain, and one slip can send your detent flying across the room, never to be found again. I was able to avoid this fate with some finagling, but a purpose-built tool for this would have certainly sped things up and lowered the risk. Again, this can be found at places that sell AR tools, including Midway and Brownells.

So there you have it. My lower is mostly assembled, The buttstock (M4-style telescoping carbine) is already on order, and should arrive in about a week. Then, I move on to the expensive stuff. Everything besides the CMMG stripped lower is being assembled with parts ordered from Rock River Arms.

Thanks to aepilotjim and the rest of the folks from the GBC for their assistance in this endeavor. For a good guide to assembling your AR, check out the How To Build An AR-15 videos over at Brownells.

Monday, August 2, 2010

The AR Project Begins

This is my rifle. There are many like it, but this one is mine.

Well, not quite a rifle yet, but it's mine. It's a CMMG stripped lower. I had my FFL order it from Midway USA, and it came in this morning. I'm going to be doing this build over a few months, and will document my progress here. Next on order will be the lower parts kit, and then the build process will begin.

My tentative plans are to build an M4-style carbine, with a 16" mid-length barrel/handguard configuration. I look forward to the build and documenting my progress here.

Sunday, July 25, 2010

Road trip on the horizon...

Christina over at Lucrative Pain has graciously invited nearly everyone she knows for a shindig at her place this coming weekend, including several of the bloggers (gunny and otherwise) I've been following for a good couple of years now.

Being a Friday night party and all, most in attendance will be relatively local to her area. Having missed Phlegmmy's Texas Gunblogger meetup early last year (due to lack of employment and therefore discretionary spending money at the time), I've decided I'm going to make this one. I'm told this is not a gunnie-only meetup, but general bloggers and even non-bloggers alike getting together for a party. I also figure it's the neighborly Texan thing to do, seeing as how she's only recently moved to the state. Also, I love road trips, and this will be the first of any significant distance in the truck.

I'm taking off of work midday, and it's something like a 5 hour drive up to her place. It just so happens that Dublin is located along my planned route, so I'll be stopping there to provide some premium Dr. Pepper for the party.

I'm looking forward to it!

Saturday, July 24, 2010

Blogger, reloaded.

I'd start off this post with some sort of apology for my absence, and promises that I'll do better to keep up with a more regular schedule... but I won't. I've been busy with life events and whatnot, and my downtime has been utilized for other purposes.

"What life events?", you ask?

Well, I got married. After 4 1/2 years (or thereabouts) of dating and engagement, we finally made the commitment of marriage to one another. I am glad to have done so.

Since the beginning of the year, I've picked up a couple of new activities to occupy my time.

First is reloading. For Christmas last year, I received a Lee 50th Anniversary Breech Lock Challenger Kit from my now Mother-in-Law. In short, this is a single stage reloading press (including all the fixin's except dies) with some pretty useful features. I started out with 9mm, as it's by far the caliber I shoot the most (and had collected the most brass for). I've since expanded to .380, .38 Special, and 9x18 (Makarov). I hope to add .45 ACP and .223 in the near future, but that depends on my acquisition of firearms in those calibers. An AR build is already in the works, which I'll document here as I go along.

I'll have several posts in the future about my reloading activities and experiences. Expect some to be bullet, powder, or caliber-specific.

Secondly, I've taken up fishing. I'm certainly not very good at it yet, but I've got friends to help me along. I really want a boat to fish in, however that requires storage space that a (non-bachelor) apartment simply doesn't provide. My bride tells me a house is required. I'll have to get cracking on that one. Anyhow, as I mentioned, I'm not terribly good at fishing yet. It's an enjoyable activity, and certainly beats sitting around the house.

I'm sure there's plenty I'm leaving out here, but that will have to wait until later. I'll try to get another post up later in the day.

Sunday, March 14, 2010

Stoeger Condor Update

Better late than never, I promised a followup post about my impressions about the Stoeger Condor.

I didn't get nearly the bird hunting in this season that I did last year, so I've only gotten a moderate amount of trigger time on the Condor. However, my latest experiences with the gun have been positive.

Starting late in the season last year, I switched my dove loads over to Remington ShurShot #7-1/2 shot. I found that this load more reliably takes birds and gives better pattern density than the cheap Winchester Super-X that you see on sale during the run-up to dove season. The biggest difference between these two is the Remington loads use 1 1/8oz of shot, while the Winchester loads only use 7/8 oz. That's nearly a 30% increase in shot when comparing the two. To me, the performance is certainly worth the slightly higher price.

Anyhow, I've had great results with the Condor with the few dove hunts I got in this year. Having only hunted dove with an 18" open cylinder previous to this, It took a bit of work to get myself adjusted to a 26" improved/modified pair of barrels. Later in the season when dove are fly further out and higher, this is certainly an advantage. I'm quite happy with the range I was able to make hits with the Condor. My only negative experience when dove hunting was when the doves were swarming above me just as I was reloading. Ejectors would have speed things up here, and I can certainly see their advantage now.

Most impressive, however, was its performance of the Condor hunting duck. I had the opportunity to go on my first wader hunt for wood ducks in the East Texas Piney Woods, and loved the experience. Range and accuracy was most impressive out of the Condor, shooting Remington ShurShot #2 (1-1/4oz) 3" steel. I was able to make a hit on a fast mover just above the trees, flying perpendicular to me. The steel patterned so well that I hit the neck of the bird and nearly shot it clean off, dropping it DRT.

I wish I had more photos to give you, but hunting in waders doesn't exactly lend to lots of photography. Next season, I'll be sure to have a quality point-and-shoot to bring along.